Massive annihilation.
Welcome to the battle guide against higher level players!
NOTE: Do not vandalize, as we can track your IP address and get you banned.
This guide is meant for those who are in a tight situation with another, more powerful player who would not accept your truce or just want to get rid of him.
NOTE: This guide is for players who unlocked all monsters.
Basic Defensive Measures[]
Check your attack report log and see what he attacks you with most of the time. Then adjust to his attacking style, find if your base has a weak spot, fix all weak areas, etc. Here are some combinations of monsters and their weaknesses:
Prepare ADTs for Fomor and Zafreetis, then your champion (except Fomor) will handle the D.A.V.E. If your champion is Fomor, prepare a D.A.V.E. or Balthazars in the Monster Bunker.
Somewhat easier to defeat with the right base, if the enemy uses Gorgo, then prepare, as his massive endurance can let him stand for quite a long time, and after Gorgo tanks, the enemy usually flings the D.A.V.E. afterwards then the Zafreetis. To fight this, defend your ADTs as the enemy will dig his way to it with the D.A.V.E.s and/or Gorgo or the enemy would simply catapult it. However if you put your champion on the center/near the center, then the base will be immune to the champion. Fill bunkers with D.A.V.E.s or Eye-ras or Banditos to fight off Gorgo.Mostly use King Wormzers and D.A.V.E with rockets.
If Drull is used, then just fill your Bunkers with Banditos, then your champion and the ADTs will handle the rest.
- D.A.V.E. and Zafreeti alongside Korath:
The hardest combination to defeat but uncommon, as Korath is there. If you have a Korath then do not worry much. If not, then these are things you must know:
- Korath with Fists of Doom and Breath of Fire can destroy Death Traps at ease, prevent pathing and kill Fomors. Also it can destroy Box Yards at ease.
- Korath can defeat any champion, even itself. This is because of Burn (
 ).
). - Along with Zafreetis and D.A.V.E.s, they can destroy ADT's and get damaged minorly.
- Korath heals very quickly taking 8 hours and 34 minutes at max.
These can be countered.
Problem 1 can be countered by not having Box Yards, and upgrading Blocks. Problem 2 can be countered by Pokeys/Octo-oozes in the Bunkers, and if you have Whirlwind Banditos at maximum level, bunker those. If the Korath has Fists of Doom, use a Fang with Venom(![]() ) inside your bunkers. and Problem 3 can be countered by properly placing your Towers, and Problem 4 can be countered provided you have a Korath or strong towers.
) inside your bunkers. and Problem 3 can be countered by properly placing your Towers, and Problem 4 can be countered provided you have a Korath or strong towers.
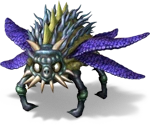
- Aerial Assaults (Teratorns, Zafreetis, and flying Fomor)
Easily defeated with a high level ADT and a Korath with Breath of Fire alongside D.A.V.E. with Rockets ![]() .
.
Can be defeated by Microchipping your base. Also defeated by stalling the Project X with massive numbers of Pokey.
Advanced Defensive Measures[]
It is highly recommended you do these.
- Make Death Traps.
- Use an NEC/NECoRG and NECoB (lure blocks for Eye-ras)
- Cataproof the Bunkers and/or ADTs
- Use pathing
- Read your attack log every time to see weak areas and to see how the enemy attacks
- Use the proper champion
- Learn the enemies ways of attack
After you do all these, create a good base that can fight against his attack strategy. However if he attacks with assorted monsters, simply make a base which can defend against Eye-ras (NECoB) and all other sorts of Monsters.
Attacking Great and Defending from Well Planned Attacks[]
Here are just some rare yet smart combinations of monsters you need to be on the lookout for:
- Balthazars
 , Korath
 , D.A.V.E.
 , Zafreeti
 , Pokey
 /Octo-ooze
 /Zagnoid
  (Probes), Krallen
 (optional):
This is a quite good combo due to Koraths Burn (![]() ) able to kill the champions and destroy walls and pathing if it has Fists of Doom and will destroy ADTs. Balthazars should be flung in when an ADT defending the Bunker is destroyed. After fling the D.A.V.E.s near the other ADT. After fling in more(3 or 4) Zafreetis with the Korath and 1 Zafreeti to the D.A.V.E.s. After use Putty Rage (10 Million) to make the Korath attack way more fast (x2 rate for Fist of Doom if he has this), the D.A.V.E. have a very quick attack rate and Zafreetis will heal extremely quick. Also they would endure even better. Remember, you should first probe the Bunkers with an Octo-ooze/Pokey(if exposed/very weak towers)/Zagnoid(if deep/strong towers). If your enemy has catapultable ADTs, use a Twig Missile/Pebble Bomb.
) able to kill the champions and destroy walls and pathing if it has Fists of Doom and will destroy ADTs. Balthazars should be flung in when an ADT defending the Bunker is destroyed. After fling the D.A.V.E.s near the other ADT. After fling in more(3 or 4) Zafreetis with the Korath and 1 Zafreeti to the D.A.V.E.s. After use Putty Rage (10 Million) to make the Korath attack way more fast (x2 rate for Fist of Doom if he has this), the D.A.V.E. have a very quick attack rate and Zafreetis will heal extremely quick. Also they would endure even better. Remember, you should first probe the Bunkers with an Octo-ooze/Pokey(if exposed/very weak towers)/Zagnoid(if deep/strong towers). If your enemy has catapultable ADTs, use a Twig Missile/Pebble Bomb.
(If you have Krallen, fling it immediately after Korath)
To defend against it, simply make a design that can't easily be probed to keep the monsters a surprise(and also try to cataproof the Bunkers). Also make the ADTs cataproof and also defend them well (fortify, upgrade, etc.). Also center your Champion Cage for the best protection, and upgrade your towers(and fortify) to fight off Korath.
- Slimeattikus
 , Korath/Gorgo
 /
/ , Eye-ras
 , Zafreetis
  , Project X/Sabnox
  /
/ , D.A.V.E.s
  , Probes (Pokey
  , Octo-ooze
  , Zagnoid
  ), Grokus
  , Krallen
  (optional):
Another advanced and complex combination and extremely rare too. Fling in a probe to see whats in the bunkers, and if its Eye-ras, then just bait them out and let them self-destruct. If not, then use Eye-ras/Catapult. That way the wall will be destroyed and bunkered monsters will be doomed. If you have a Korath however, you can use them instead. If you have a Gorgo, then Eye-ras are necessary. Fling the champion to a spot where it can catch lots of attention. Then use Project X/Sabnox to destroy the towers. Grokus will be flung in after the Project X/Sabnox and then Zafreeti will be flung in with the Champion when the tower monsters attack an ADT. Slimeattikus should be flung in to attack the General Buildings and then fling in D.A.V.E.s on the other part of the base (on a safe distance) to take hits and then use Sabnox/Project X to destroy the towers quickly to make D.A.V.E. safe. Use Zafreeti when D.A.V.Es health is critical (When its red) as the heal is 1000 and every second the heal is done more than 4 times. (Optional) Fling in Krallen after the Zafreetis along with D.A.V.E. Use the Putty Rage and watch the destruction.
To defend against this, make sure you made your Bunkers cataproof, and not in the "Bait Zone" and also not behind the exposed walls to make sure Eye-ras cant explode near it. Also upgrade the Bunkers to make them use a lot of resources to simply send them into their damaged sprite, or defend against the 100 K catapult Bunker Break, which is used on Bunkers which are low leveled(Level 1). Put your cage to the center, and prepare good assortments of monsters in the Bunker.
Remember to also put a NECoB ![]()
![]()
![]()
![]() .
.
Monsters, how to deal with them and properly use them[]
Here is are the Monsters and how to deal with them and use them wisely.
Pokey[]
The weak yet useful Pokey. At low levels, this is quite useful. However as the enemies bases progress, that means the downfall of Pokey. Or can it be the rise? Monster Bunkers are put with Eye-ras due to their massive damage. This gives you the upper hand. Flinging in the Pokey to let the Eye-ras explode for your other monsters to wreak havoc without having to worry about the wretched Eye-ras that are Bunkered. Also due to its quite small spaces and Goo (![]() ) Cost, it was not even worth it for the Eye-ra to blow up. Also in massive numbers, they can kill a Drull at ease. This is good for probes too.
) Cost, it was not even worth it for the Eye-ra to blow up. Also in massive numbers, they can kill a Drull at ease. This is good for probes too.
Octo-ooze[]
The first tank you will get in the game, this has good uses, even at high levels. Useful as a probe, tanking, and stalling. He has low damage but what it lacks in strength, it makes up for its endurance. Use this to bait pesky Eye-ras if the towers defend the Bunkers.
Bolt[]
It has the weakest stats (excluding Movement Speed) in the game. It is also an early monster able to learn a skill, which is Teleportation. This monster is a looter and is good for quicker looting(due to his speed). However this is only advisable to those who are not high level/have not yet unlocked Brain. His teleportation at level 3 (450 Range) surpasses the range of any tower (without the Outpost height boost) but is currently unknown whether it can surpass the range of advanced towers(Tesla, Railgun) at their maximum potential(level 7-8) or a level 4-5 Monster Bunker.
Fink[]
With its good damage and its ability to hit multiple targets, this monster is a must have at low-medium levels. If used with a tank, this monster can wreak havoc while those tanks would take the damage for them. Because of its low health, it is really advised to use these with tanks.
Eye-ra[]
This monsters amazing damage comes with a flaw. It self-destructs and aims for walls. This monster is good in the Bunker, but they have to be unbaitable. This is also good if you wish to defy pathing/destroy a defensive layer of blocks. Useless to bases with NECoB.
Ichi[]
Having higher damage and health than Octo-ooze, this monster is a good tank. This monster withstands damage well, and has quite good damage. Note that Ichis are weaker than Zagnoid when both are fully leveled.
Bandito[]
With his good damage and moderate health, this monster is good for bunkering, especially when it has its ability "Whirlwind". These monsters are good if the tank monsters are dead, as they have good health for survival, and with its damage they can take down buildings. They can take down Fangs easily when both are level 6(Fang health:400, Bandito damage:450, Fang damage:800, Bandito health:900).
Fang[]
With its massive damage, they are ideal for quick annihilation of bases. Fangs venom can kill a champion easily, and are good for bunkering. A level 6 Fang cannot defeat a level 6 Bandito. Use this only when you need to destroy bases quickly, as this monster is costly.
Brain[]
Being a better looter than Bolt, this monster should not be toyed with. It has high health although coming with the flaw of having low damage. When this monster obtains Invisibility, it will be quite useful. But like Pokey, its power comes in numbers.
Crabatron[]
The most powerful tank in the Overworld, this monster has quite high health, and best used with its pair, Project X ![]() . This monster can take the damage while the others wreak havoc. Just beware, it is costly so use this monster only when necessary.
. This monster can take the damage while the others wreak havoc. Just beware, it is costly so use this monster only when necessary.
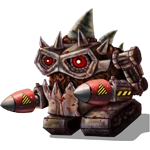
Project X[]
With its staggering damage, this monster is a good tower demolisher provided you have a tank with it(Zagnoid ![]() is recommended). This is needed to make a strategy called PPX. This monster however is very costly and requires a tank to survive. Also its Acid Spores are quite useful as when dead, this monster damages buildings near it as a mini eye-ra.
is recommended). This is needed to make a strategy called PPX. This monster however is very costly and requires a tank to survive. Also its Acid Spores are quite useful as when dead, this monster damages buildings near it as a mini eye-ra.
Slimeattikus[]
One of the two new monsters, this can split into smaller versions when killed. That ability is called Fission. Due to its high attack, this monster can destroy buildings quick. Its even better than Fang ![]() , but still needs a tank to let him destroy while the tank takes the damage. Note that it is weak against splash damage, even if it has fission, it is not advised to be sent alone.
, but still needs a tank to let him destroy while the tank takes the damage. Note that it is weak against splash damage, even if it has fission, it is not advised to be sent alone.
Vorg[]
A healing monster ideal for lower levels. This is the second healing monster in the game and is easily killed, so this is not advisable for higher levels.
| Level | 1 | 2 | 3 | 4 | 5 | 6 |
|---|---|---|---|---|---|---|
| Movement speed | 0.75 kph | 0.75 kph | 0.75 kph | 0.75 kph | 0.75 kph | 0.75 kph |
| Health | 750 | 750 | 750 | 750 | 750 | 750 |
| Damage (Heal) | 60 | 70 | 80 | 90 | 100 | 110 |
| Goo cost | 16,000 | 25,000 | 38,500 | 62,500 | 75,000 | 90,000 |
| Housing space | 60 spaces | 60 spaces | 60 spaces | 60 spaces | 60 spaces | 60 spaces |
| Production time | 20m 00s | 20m 00s | 20m 00s | 20m 00s | 20m 00s | 20m 00s |
| Upgrade cost (putty) | 384,000 | 384,000 | 384,000 | 512,000 | 768,000 | 1,024,000 |
| Upgrade time | 1d 12h | 1d | 1d 12h | 2d | 2d 12h | 3d |
| Healing to housing ratio | 1 | 1.167 | 1.333 | 1.5 | 1.667 | 1.833 |
| Health to housing ratio | 12.5 | 12.5 | 12.5 | 12.5 | 12.5 | 12.5 |
Wormzer[]
Being a cheap yet powerful monster, this monster is good to destroy weak walls (Wood, Stone) with its splash damage, so this can be a path breaker. This monster has a better alternative, King Wormzer, which do 4800 max splash damage, while wormzers do 1650 splash damage when its splash is at level 3. Use this if you dont have King Wormzer and/or have enough Magma.
| Level | 1 | 2 | 3 | 4 | 5 | 6 |
|---|---|---|---|---|---|---|
| Movement speed | 3.00 kph | 4.00 kph | 4.00 kph | 4.00 kph | 4.00 kph | 4.00 kph |
| Health | 600 | 800 | 1,100 | 1,300 | 1,500 | 1,700 |
| Damage | 300 | 400 | 550 | 600 | 650 | 700 |
| Goo cost | 20,000 | 25,000 | 30,000 | 35,000 | 40,000 | 47,500 |
| Housing space | 70 spaces | 70 spaces | 70 spaces | 70 spaces | 70 spaces | 70 spaces |
| Production time | 23m 4s | 23m 4s | 23m 4s | 23m 4s | 23m 4s | 23m 4s |
| Upgrade cost (putty) | 4,096,000 | 4,096,000 | 8,192,000 | 8,192,000 | 8,192,000 | 12,800,000 |
| Upgrade time | 2d 14h | 1d | 2d | 3d | 4d | 5d 8h |
| Attack to housing ratio | 4.29 | 5.71 | 7.86 | 8.57 | 9.29 | 10 |
| Health to housing ratio | 8.57 | 11.4 | 15.7 | 18.6 | 21.4 | 24.3 |
Teratorn[]
The most important component of an aerial assault, this monster should not be meddled with. Use these wisely, as they take 70 spaces and are costly.
| Level | 1 | 2 | 3 | 4 | 5 | 6 |
|---|---|---|---|---|---|---|
| Movement speed | 2.50 kph | 2.75 kph | 3.00 kph | 3.25 kph | 3.50 kph | 3.50 kph |
| Health | 1,600 | 1,900 | 2,400 | 3,000 | 3,600 | 4,200 |
| Damage | 300 | 350 | 400 | 500 | 600 | 700 |
| Goo cost | 70,000 | 95,000 | 145,000 | 200,000 | 300,000 | 400,000 |
| Housing space | 70 | 70 | 70 | 70 | 70 | 70 |
| Production time | 30m | 32m | 34m | 36m | 38m | 40m |
| Upgrade cost (putty) | 4,096,000 | 4,096,000 | 7,000,000 | 10,000,000 | 16,000,000 | 24,000,000 |
| Upgrade time | 2d 14h | 1d 12h | 2d 6h | 3d 12h | 5d 16h | 7d |
| Attack to housing ratio | 4.29 | 5 | 5.71 | 7.14 | 8.57 | 10 |
| Health to housing ratio | 22.9 | 27.1 | 34.3 | 42.9 | 51.4 | 60 |
Zafreeti[]
The best healer, this monster is a good support monster. This monster cannot be bunkered and is only for support. Its biggest weakness is Aerial Defense Tower. Note that Zafreeti only heals 10% for champions.
| Level | 1 | 2 | 3 | 4 | 5 |
|---|---|---|---|---|---|
| Movement speed | 0.75 kph | 0.80 kph | 0.85 kph | 0.90 kph | 0.95 kph |
| Health | 8,000 | 8,000 | 8,000 | 8,000 | 8,000 |
| Heal | 400 | 550 | 700 | 850 | 1000 |
| Goo cost | 120,000 | 180,000 | 256,000 | 324,000 | 468,000 |
| Housing space | 200 | 200 | 200 | 200 | 200 |
| Production time | 40m | 40m | 40m | 40m | 40m |
| Upgrade cost (putty) | 2,056,000 | 2,870,000 | 4,500,000 | 6,000,000 | 18,000,000 |
| Upgrade time | 1day | 2days | 3days 8hrs | 4days 12hrs | 5days 16hrs |
| Healing to Housing ratio | 2 | 2.75 | 3.5 | 4.25 | 5 |
D.A.V.E.[]
A great monster, especially with Rockets. Best for attacking and putting in the bunker. This monster has the highest health (excluding champions), and has good damage. Best alongside Zafreeti ![]()
| Level | 1 | 2 | 3 | 4 | 5 | 6 |
|---|---|---|---|---|---|---|
| Movement speed | 0.80 kph | 0.85 kph | 0.90 kph | 1.00 kph | 1.10 kph | 1.20 kph |
| Health | 8,000 | 9,100 | 10,000 | 12,000 | 16,500 | 21,000 |
| Damage | 1,500 | 1,500 | 1,600 | 1,700 | 1,800 | 1,900 |
| Goo cost | 150,000 | 225,000 | 337,500 | 440,000 | 600,000 | 800,000 |
| Housing space | 160 spaces | 160 spaces | 160 spaces | 160 spaces | 160 spaces | 160 spaces |
| Production time | 1h | 1h | 1h | 1h | 1h | 1h |
| Upgrade cost (putty) | 8,192,000 | 8,192,000 | 10,000,000 | 12,200,000 | 19,200,000 | 28,000,000 |
| Upgrade time | 1d | 2d | 3d | 4d | 6d | 8d |
| Attack to housing ratio | 9.375 | 9.375 | 10 | 10.625 | 11.25 | 11.875 |
| Health to housing ratio | 50 | 56.875 | 62.5 | 75 | 103.125 | 131.25 |
Those are all Overworld Monsters. Now for the Towers.
Towers[]
Basic Towers[]
These towers dont have that much advanced technology. The two are:
Sniper Tower[]
Pros and Cons[]
Pros
- Best for picking small groups of monsters
- Good for support due to its range
- Can hit aerial monsters
Cons
- Bad against massive numbers of monsters
Cannon Tower[]
Pros and Cons[]
Pros
- Best against huge numbers of weak/low health monsters
- Best alongside pathing
Cons
- Cannot hit aerial monsters, so it has to be defended by another tower that can attack aerial monsters
- It has quite low range
Advanced Towers[]
These towers have been applied with advanced technology, like Teslas, Lasers, and accurate salvos(ADT).
Tesla Tower[]
Usually the first good tower you will obtain, this tower has incredible damage in the total charge shots and strikes aerial and land monsters.
Pros and Cons[]
Pros
- Against land champions these are top one.
- Can strike aerial and land monsters.
- Has good range, along with high damage per charge.
- Good against unsupported high health monsters.
Cons
- Very bad when up against a normal monster with a Zafreeti supporting him.
- Has a bad performance (but not as bad as the Snipers) against massive groups of monsters.
Laser Tower[]
The best when it comes to battling massive groups of weak monsters. When supported by a Tesla, they can be very efficient.
Pros and Cons[]
Pros
- These towers have quite amazing damage to groups.
- It can deal with Pokey Bombs easily
Cons
- They are bad against strong monsters.
- It may have a lot of damage, but it has quite low range and weak durability.
- D.A.V.E.s with Rockets can hit these towers without much problem.
- The tower cannot attack Aerial Monsters.
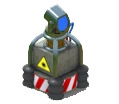
Aerial Defense Tower(ADT)[]
These are best put close to the core of the base. Remember make these towers uncatapultable.
Pros and Cons[]
Pros
- This tower has excellent power against aerial monsters.
- Zafreeti and D.A.V.E. is easily eliminated with this tower and some other support.
- It has excellent range
Cons
- They can easily be destroyed with land monsters, as they cant attack land monsters.
- Players usually catapult these towers, so try to make it cataproof.
Railgun[]
It shots an infinite line at the most high-health monster, so remember to pick up a sniper to deal with the high health monster.
Pros and Cons[]
Pros
- Make use of its infinite range and high damage and it will be a hall of death to monsters.
- High damage. Can kill level 6 octo at level 6.
Cons
- The railgun only aims at the highest health monster, so they can't destroy pokey bombs.
- Slow reload time, by the time the pokeys might had munched down the building.
- Only fires a Straight Line
- Eye-ra and Valgos might ruin pathing.
- Aerial Assault=Destroyed Railgun


